
Well, a new year is here! Somewhere in my brain it feels as if it just turned 2018 and here we are at 2019! I think that’s something that happens as we age – the whole “time goes faster” thing… One of those things that people told me about when I was younger, but never really understood or grasped until around the age of 40 and has become increasingly more vivid with each passing year.
When New Year’s comes around, many of us think about resolving to take care of our body…lose some weight, exercise, eat better… but how often do we resolve to take better care of our face – our skin- especially as we’re getting older, and let’s face it (no pun intended) that’s all of us! Our face is the main focus of our whole persona. When a stylist dresses you, they’re going to tell you to always make sure that the accessories are drawing attention to your face. That’s ALWAYS the goal. Un-taken care of, your face is going to be the place where your age is going to show first, or where you’re going to look much older than you need to.
In the past I’ve shared with you a couple of homemade scrubs and lotions that I’ve used. Today, I’m sharing with you two homemade masks that I have begun using in the past year. I have found them to be invaluable and use them both religiously. I’ll be honest, I’m basically a lazy person – truly…it’s the Type B personality thing. If it did not ABSOLUTELY work for me, I would not take the time to make it and use it… just wouldn’t be worth the effort. These two masks have stood the test and have shown genuine results. NOT overnight, mind you…I’m not going to try to sell you snake oil. You have to give it a little time. I’d say I saw results from each in about a 3 month time span, give or take, though the change in the feel of my skin was immediate. So here we go….
Wheat Germ_Yogurt Neck Mask
1/2 teaspoon active dry yeast
1 teaspoon water
2 tablespoons wheat germ
3 tablespoons plain Greek yogurt
avocado oil *optional
Combine yeast and water; set aside
Combine wheat germ and yogurt; mix well
Add yeast mix to yogurt mix and blend well.
Apply liberally to neck, under chin and decollete
Allow to sit for 40 – 60 min. then rinse off with warm water
After rinsed and dried, massage area with avocado oil in upward motions
Apply mask 2 -3 x’s a week. Use avocado oil daily.
This is the recipe exactly as I got it from YouTube. Here are my tips/alterations. I use this every other day. I started out using the avocado oil with it, however, because I have started using Revolution Baking Oil daily with my makeup routine and the next mask I will list uses Vitamin E oil, I no longer use the avocado oil and I’ve seen no change in the results – it’s still working great. But, the avocado oil did work well. If you’re not using another oil, I do recommend it and it’s not very expensive. I just got it in the cooking oil section at Wal-mart. Nothing fancy.
Also, this dries very crusty. You’ll feel the skin get really tight. Before I rinse it with warm water, I take a paper towel and, over the sink or a trash can, I “scrape” off the top layer. Once the majority is off, then I use a warm rag to wash off the remaining. It’s actually less messy and mushy this way.
You can use this on your whole face. HOWEVER, it does get VERY tight so it is uncomfortable if it’s on your entire face and it kind of puts your face out of commission for a complete hour. When it’s just on your neck you can still move around and do things, though, be warned, it does occasionally flake a little and fall, so you might not want to be on a couch or good carpet or working with food that it might fall into.

Last tips… you DO NOT need to put this on in a thick layer (mistake I made in the beginning.) A nice thin coverage is sufficient and just as effective. If you put it on too thick all you’re going to do is create a bigger mess, more dripping and flaking and it won’t dry out as well, which you want it to do. Also, because you use so little you are going to have quite a bit left over. You can seal it tightly and store it in the refrigerator. I keep mine for a week, but NO LONGER. The yogurt and yeast will go bad after that. If you’re using it every other day it will be pretty much used up in the week anyway.
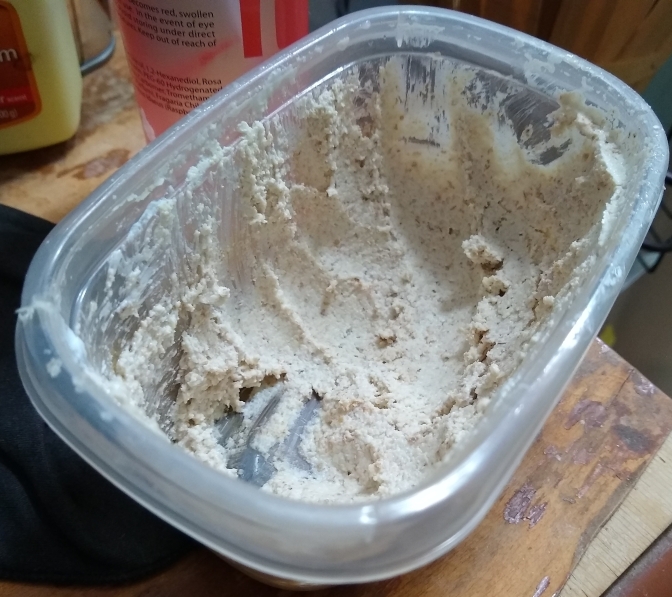
Baking Soda/Coconut Oil Face and Neck Mask
1 tablespoon baking soda
2 tablespoons coconut oil
*Vitamin E oil, as desired
Mix the ingredients well in a bowl until the paste become almost whipped cream like.
Apply on face and neck.
Leave on 5 – 6 minutes.
Rinse with warm water
– – – – – – – – – – – – – – – – – – –
Could this possibly be any easier?! The original recipe did not call for the Vitamin E. I added that on my own simply because of the knowledge of how good it is for your skin. It has tremendous healing properties. I have not regretted for a moment including it. When I make this I actually triple the recipe and keep it stored in a small plastic container so I have it for some time. You use very little at an application. It goes a long way.
When you apply it, massage it into your skin in a circular motion as you go. I do apply around my eyes. Do this very carefully. That baking soda will burn like the dickens if it gets in your eyes! Trust me I know! Also, be careful around your mouth… it doesn’t taste very good, though technically, the baking soda and the coconut oil are both good for your teeth!
After it’s on just let it set for a bit – I do 5 – 10 minutes. When I rinse, I begin with my fingers. I wet them and then use them to massage my face and neck in circles again. I then rinse my fingers and repeat. I do this 3 – 5 times. After this I use a rag in warm water and remove whatever is left. Let me tell you, between the coconut oil and the Vitamin E, your skin feels absolutely heavenly afterward!
FYI… this is coconut oil based. In the warmer temps the coconut oil will change consistency. This will not affect the effectiveness of the scrub, however, for ease of use sake, I keep mine either in the refrigerator as things get warmer OR I set it on top of our air conditioner in the bedroom (near the bathroom where I use it) so it stays at a solid state. Something to consider.
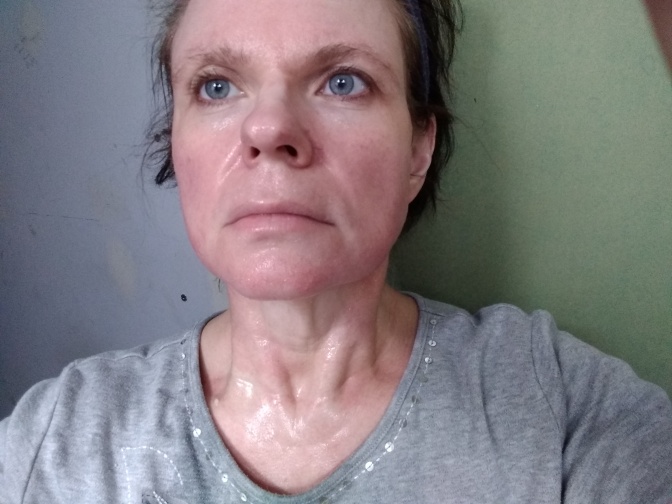
Normally, I do these masks on alternating nights, but in a pinch, I have done them on the same night, one after the other, and have had no bad effects from doing so. The results from using these masks? My skin has been brighter, clearer, and I have noticed a definite increase in the tightness of my skin, particularly in my neck area. This was of particular concern to me since my weight-loss surgery left my neck skin especially loose. It’s not as tight as I’d like it to be (but whose is?), but there is a marked improvement. For the pennies it cost me, the ease it takes to make them and the peace of mind knowing I’m using items that are so natural and God-given…I’ll TAKE IT!
Finally, now that your skin looks amazing, let’s put my make-up artistry lessons to use and share a few quick tips on keeping that face looking fabulous once your foundation goes on! Nothing can ruin a beautiful face faster than foundation that looks fake or cakey. Here’s a few quick tricks I’ve learned for a more natural, glowing looking foundation.
- You’ve already learned the first trick and that is TAKE CARE Of THE SKIN YOU’RE IN. Cosmetic foundation can only do so much if your true foundation, the skin itself is poorly maintained. So along with using great masks like above, be sure you’re getting plenty of sleep (this is truly very important), drink LOTS of water, exercise, eat your fruits and veggies (they play a huge role in the condition of your skin) and, I’m sorry those who do, but QUIT SMOKING! This destroys your skin and ages you rapidly. Good news, once you stop, some of the damage will begin to reverse.
- Exfoliate, exfoliate, exfoliate. If you want a nice smooth appearance in your foundation, give it a nice smooth surface to adhere to. A mild exfoliation before your application keeps the make up from hanging onto any flaking or roughness that may be on the surface of your skin. I alternate between St. Ives Apricot Scrub and the Wal-mart version of Olay Regenerist cream cleanser which has mild micro-beads in it. The Olay version is very good, too, just a bit more expensive. You can also find facial cleansing wipes with mild exfoliants in them if you’re in a hurry.
- Don’t forget to moisturize. Regardless of the type of skin you have, find an appropriate level of moisturizer and apply before applying your foundation. This is an important step that gives the foundation a smooth base and healthy base. (* Hint: You can also spot apply moisturizer after your foundation is already in place. What?! This is a great help for those with especially dry skin or for those who develop flaking during these colder months. Just use a cotton ball, Q-tip, small buffing/concealer brush, or even just a finger tip to dab it into the flaking area and blend into your makeup.)
- Use a face oil underneath your foundation. This will give a lovely natural glow to your face. I’m a huge fan (as you already know.) of Revolution Baking Oil.
- Consider applying a liquid highlighter under your foundation rather than on top of it. This gives a more natural, glowing-from-within, effect.
- Pick Carefully. Choosing your foundation is key. Don’t worry, I am NOT telling you that you need an expensive foundation, by any means. What you do need to look for is a proper shade. Pick your shade carefully. We all know – when we see it on other people – that nothing looks worse than that “mask” look because someone picked a shade too dark or too light for their skin tone. Always try to pick your shade in natural sunlight and check it on your neck or decollete, not your wrist, as many of us were taught back in the day.
- And while we’re choosing…9 times out of 10, go for a liquid. Liquid is going to soak into your skin in a much more natural manner than a cream and definitely, than a powder. The one exception that I, personally, have found to this is the Revolution (I should get kick-backs from these people!) stick foundation, which is a cream. It’s what I’m wearing in these pictures. It goes on very smooth and natural and blends like a dream.


- Conceal first. I always start with a light concealer, concealing whatever spots and redness need taken care of first. Starting this way means that I will need the least amount of foundation possible when I get to that stage. The less you use, the more natural your face is going to look.
- Use the tools you’re born with. I’m going to buck what some people have told you and go with what I’ve learned with experience and what my head instructor, Nathan, also advises. Most people will advise to apply with a damp sponge. If this works for you – go for it. I find that using fingertips works far better. The heat from your body helps to melt the foundation into your skin (the “baking” effect that’s so popular right now), giving it a much more natural look. Additionally, your fingers give you far greater control of placement, whether applying to your own face or someone else’s. After I apply with my fingers, I take my concealer/buffing brush – the one I just used, no need to clean it – and I buff over my foundation lightly, paying special attention to places with light wrinkles, deep pores and crevices, such as around my nose.
- Finally, apply in very thin layers. What I do, and recommend, is to apply the first layer, then I’ll go and do something else, usually I do my eyes and eye brows, allowing the foundation time to “settle”. The settling time makes a huge difference in seeing whether you truly do need any touch ups or a second layer. After I finish my eyes, then I look back over my skin for anything that may be breaking through the foundation. I then go back, not with full application, but simply with my concealer/buffing brush and spot touch any necessary spots. This will keep your foundation from getting too heavily layered.
Now you’re ready to face the new year! So until we meet again…
Ronnie

I love mixing and cooking and these look pretty good to try. I will let you know when I do.
LikeLike
I do, too, Terri! I hope you enjoy these masks as much as I do! Please do let me know how they work out for you!
Have a great day! 🙂
LikeLiked by 1 person
It’s amazing the things it takes us 50 years to figure out, isn’t it?! Ha ha! And I’m STILL figuring things out! 🙂 Have a great weekend, Jodie!
LikeLike
I always appreciate the natural products, and I’ve finally been learning that I need my oil on my skin (it’s only taken me 50 years to figure this out…). So thanks for all your expertise!!
XOOX
Jodie
http://www.jtouchofstyle.com
LikeLike